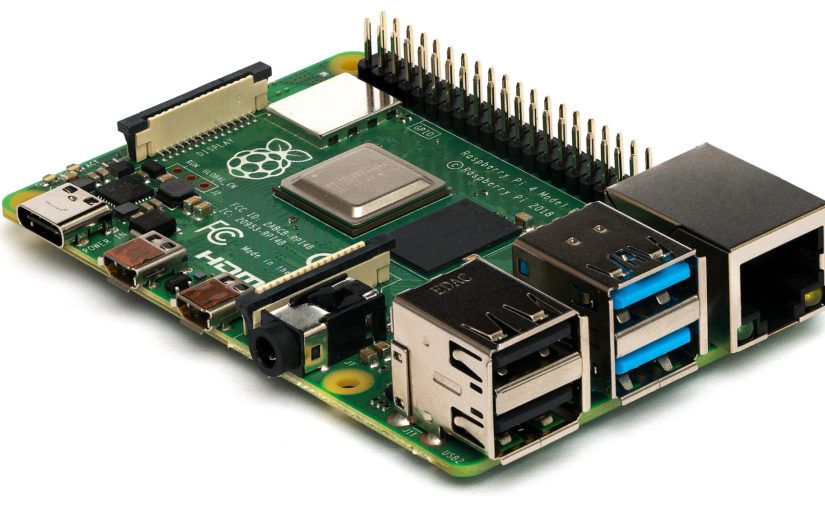
Category: Hardware

  • How to set up a Static IP to the Raspberry Pi

    How to set up a Static IP to the Raspberry Pi

    LightLightDarkDark

    If you don’t want the router to keep assigning a new IP to the pi every now and then, then set a static IP. Image Credit

    How to do it

    1: First, Check if a service is enabled:

    BASH
    
    sudo service dhcpcd status

    Sign up for our newsletter!

    1.1: If it is, you are good to go. If not, run the commands:

    BASH
    
    sudo service dhcpcd start
    sudo systemctl enable dhcpcd

    2: Run command:

    BASH
    
    sudo nano /etc/dhcpcd.conf

    3: Uncomment (remove the # that is at the beginning) the following lines:

    CONFIG
    
    interface eth0
    static ip_address=192.168.0.4/24
    static routers=192.168.0.1
    static domain_name_servers=192.168.0.1

    3: Change the line static ip-address=192.168.0.4/24 to what you want your new static IP to be. static ip_address= proceeds, /24 follows. It should look like this. NOTE: Your IP has to start with 192.168 for this to work:

    CONFIG
    
    static ip-address=[Your IP]/24

    4: Press CTRL+ALT+X

    5: Hit Y

    6: Reboot:

    BASH
    
    sudo reboot

    7: Now, on a Windows machine on the same network, open up Command Prompt and type the batch code. NOTE: THE -t FLAG IS NOT REQUIRED:

    WINDOWS BATCH
    
    ping [YOUR PI'S NEW STATIC IP] -t

    8: Now wait for a response to test if it’s working

    DONE

  • Block Ads using AdGuard Home on the Pi

    Block Ads using AdGuard Home on the Pi

    LightLightDarkDark

    If you want to block ads, then AdGuard Home is for you. AdGuard Home is an ad-blocker. But this ad-blocker would work network-wide.

    We recommend a static IP for this tutorial

    Items you will need

    • A Raspberry Pi
    • It’s peripherals

    Sign up for our newsletter!

    Installing AdGuard

    This will show you how to install it.

    This is simple because we are downloading a compiled version of it.

    1: Upgrade all our apps and some of the system:

    BASH
    
    sudo apt update
    sudo apt full-upgrade

    2: Download a compressed version of it:

    BASH
    
    wget https://static.adguard.com/adguardhome/release/AdGuardHome_linux_arm.tar.gz

    3: Create an extracted version of this that we can actually work with:

    BASH
    
    tar xvf AdGuardHome_linux_arm.tar.gz

    4: We don’t need the compressed version of this because we already have an extracted version that we are going to work with. Since we are can’t (and not going to) work with this one, lets delete it:

    BASH
    
    rm AdGuardHome_linux_arm.tar.gz

    5: Lets move in to our newly downloaded and extracted software:

    BASH
    
    cd AdGuardHome

    6: Finally, we can install AdGuard on our system as a Startup Service:

    BASH
    
    sudo ./AdGuardHome -s install

    7: Once installation completes, you should see a message in your command line.

    Accessing AdGuard via the web portal / Setting it up

    For this stage, you will need you and your Pi to be on the same network.

    1: Navigate to the portal. Go to your Pi’s IP address (to find out what it is, run hostname -I OR sudo hostname -I), followed by :3000. It should look like this:

    URL
    
    http://[IP ADDRESS]:3000/

    2: You should get a screen like the one below. Click Get Started to proceed with the setup steps:

    click get started
    Click “GET STARTED”

    3: Just race through the steps. But make sure you actually read them. If it complains that a port is in use, try a different one. I strongly recommend you have a Static IP Address set up on the Pi. NOTE: IN ORDER TO MAKE THIS NETWORK-WIDE, YOU HAVE TO SET UP “ROUTER” AS A DEVICE. IF YOU ALREADY ARE AT THE DASHBOARD, CLICK “SETUP GUIDE” IN THE MENU.

    Done

    1: You now have a full-functional AdGuard Home installation on a Pi. If you already configured devices on AdGuard Home, or you made it network-wide, you should already see stats.

  • Getting started with the Raspberry Pi

    Getting started with the Raspberry Pi

    This guide will show you how to get started with the Pi. Image credit

    LightLightDarkDark

    Step 1: Etcher

    First, download and install Etcher.

    Sign up for our newsletter!

    Step 2: Download and flash

    Now, download this and extract it. You should get an ISO file in return.

    Now, open Etcher and select your drive in the “STEP 2: SELECT DRIVE” area.

    Select the ISO in the “STEP 1: SELECT IMAGE” area.

    Click “FLASH”

    Step 3: Final Step

    Now, insert the essentials (Display, keyboard, etc. (NOT THE POWER CORD)), as well as the sd card. Now you can go ahead and plug in the power cord. Wait for a few seconds. If you see the green LED labeled “ACT” flash for a second, power on your monitor. The setup will guide you. Follow the setup wizard.

    Step 4: Done!

    You are done! Here are some commands you should run in the terminal. You don’t have to, but I recommend you do.

    BASH
    
    sudo apt-get update
    sudo apt-get upgrade

    Thanks for reading!