Category: Software

  • How to capture Wi-Fi data using Wireshark

    Here is how to use Wireshark for beginners. It was originally known as Ethereal and it can capture packets in real-time and display them in a readable format on your computer.

    Things you will need – Hardware

    • A Computer
    • A Wi-Fi connection/router

    Things you will need – Software

    • Wireshark. I will show you how to install it soon

    Step 1: Download and install Wireshark

    You have to go to Wireshark’s website to download Wireshark for Windows or macOS. If you are using Linux, the download will slightly vary by distribution. Most of the time, it is in the OS’s package repository. Ubuntu users can find it in the Ubuntu Software Center.

    Just know that many organizations do not allow such tools on their networks. It is best to play it safe and not use this tool at work unless you have permission.

    Tip: “The UAC crisis”

    Depending on how you installed Wireshark, you might get bombarded by UAC prompts if you run it. I don’t think you can turn this off, but you can reduce the amount of UAC prompts you get to only one prompt if you run it as administrator. Most of the time, I don’t have the patience to actually run it with administrator privileges yet I don’t have the patience to answer “Yes” to every dialog it throws at me. The below steps will help you run it with administrator privileges by default.

    1: Open file explorer

    2: Navigate to C:\Program Files\Wireshark (Path in URL form). The path might be different if you have changed your installation directory

    3: Look for “Wireshark.exe”

    4: Right-click “Wireshark.exe”, click “Properties”, and navigate to the “Compatibility” tab.

    5: Check the “Run this program as an administrator” option under “Settings”

    Capturing packets

    Now we can run Wireshark. The software looks quite modern for what you were probably thinking, for an open-source project. You can click on a wireless interface. For example, if you wanted to capture packets over Wi-fi, you would click your wireless interface. For me, and for most people, this Wi-fi interface is simply called “Wi-Fi”. When you double-click on these interfaces, you can capture packets with them. In this tutorial, I will use my Wi-fi interface.

    Like I said, as soon as you double-click the interface’s name, a list of packets will appear in real-time. Wireshark will show you each packet coming to or from your computer, as well as tools to dive deeper into each packet, like packet details, source, destination, protocol, and even the raw hex of the packet.

    Should you have promiscuous mode on, you will see every single packet going through the network, not just the ones that happen to be going in and out of your computer. Even though it is enabled by default, if you ever so happen to get it disabled, you can always enable it and check if it is enabled by going to Capture>Options>and checking if the “Enable promiscuous mode on all interfaces” checkbox is enabled. This is an example of a packet I captured:

    This is how the packet list should look like:

    Click the red “Stop” square at the top left-hand corner if you think sniffing time is up.

    Sign up for our newsletter!

    You can also keep the packets for saving if you need to share them or come back to them later by going to File>Save to save them as a local file. If you want to retrieve a packet file, go to File>Open>and select the capture file to monitor.

    Filters

    Out of this massive list of packets to inspect, if you are looking for a specific type, you would probably have a hard time finding it in that long, always growing list. This is where filters come in. The easiest and basic way to apply a filter is to enter it into the program’s filter box located above the packet list and then clicking the arrow button or enter. In this example, I will be typing “ARP” into the filter box and I will only see packets that use the ARP protocol for network transmission.

    If you start trying to use filters, you’ll start to notice that Wireshark’s version of “filters” are more tech-heavy than you probably expected them to be. Wireshark has got some great documentation on how Wireshark’s language with filters works. You can add your own filters or check out some existing ones when you go to Analyze>Display Filters.

    Color-Coding

    If you have “Colorize Packet List” turned on at the top bar, the packets will be colored. Wirehark does this to help you identify their type at a glance. You can put your own coloring rules in View>Coloring Rules. You can see what they mean here, too.

    TCP, UDP, TLS, HTTP, HTTP/2, and QUIC stream monitoring

    Annother cool thing you can do with this software is to right-click on any packet that has the following protocol:

    • TCP
    • UDP
    • TLS
    • HTTP
    • HTTP/2
    • QUIC

    To find the protocol of a packet, look under the packet’s “Protocol” column. Anyway, after you right-click an applicable packet, you can go to Follow>and click whatever option it will let you click or just click the one that seems appropriate for your protocol.

    This will show you the full conversation between the server and the client.

    Close the window and you’ll find a filter has been applied automatically. Wireshark is trying to show you only the packets that belong to the conversation you were following just now.

    Inspecting deeper into these packets

    You’ve most likley noticed now that you can click on a packet and you can dig down into it’s details.

    You can also create filters based off of this information, just right-click any detail and use the “Apply as Filter” submenu.

    Sample Captures

    If there is nothing good to find on your network, you can use a sample capture off of Wireshark’s wiki.

    Name resolution

    If IP addresses are too much for you, use name resolution. To enable it go to View>Name Resolution>and enable all of them.

    Done!

    Wireshark is a very powerful tool, and yet we’ve not even made a dent in learning everything about what this software can do. You will find professionals using it for debuging network protocol implementations, finding security holes, and much more.

  • The full guide to cryptocurrency: Part 2 – Alternatives and issues

    LightLightDarkDark

    If you remembered last time, we talked about how crypto works. This time, it will be a short tutorial on all the things I did not cover last time.

    Alternatives

    Bitcoin is just one of the 4,000 cryptocurrencies that there are today. There are many alternatives to Bitcoin. Like Etherium can process transactions faster than bitcoin. Litecoin uses a more modern algorithm. Ravencoin has better mining abilities. One token is the most expensive. Its lowest as of this week was $1,000,000.

    Sign up for our newsletter!

    Issue #1: Nobody knows how much it should be worth

    Take bitcoin for example. Tesla and Microsoft announced that they were going to be accepting it, it goes way up. They announced that they are no longer accepting it, it goes way down.

    Issue #2: It has a dark side

    Many people, hackers, and ransomware will make you pay in Bitcoin because it’s hard to track.

    Issue #3: Not evreybody accepts it

    The only popular companies that accept it are:

    • Newegg (Kind of)
    • Microsoft

    Issue #4: It’s banned in some countries

    For example, China

    Bye

    I know this one was short and boring, but my next one is going to be how to mine it.

  • The full guide to cryptocurrency: Part 1 – What are they and how they work

    LightLightDarkDark

    What ARE they?

    Bitcoin is a cryptocurrency (it’s not the only one, but it’s the most popular and I am going to be talking about it a lot), which means that it’s what most people call “the future”. However, it is also known for its system, which can make it easy to find out if one system got cracked. It’s hard to hack and is very open. It’s worth a lot too.

    History

    Generally, this is practically the history of money.

    We started off with trading. Let’s say you had a horse. If that person was willing to, I could tell you that I liked the horse that you had. I could trade you something of value, let’s say, my stash of food. This system worked pretty well. It had one problem: While you might be perfectly fine with giving up your horse, maybe you did not want the stash of food.

    Then we used things like silver and gold. This way, it did not matter if you wanted the stash of food or not. You know that lots of people will also trade with it. You are getting something really of value. Fun fact: the British Pound (GBP) is called a pound because it used to be literally one pound of silver.

    After, I guess you could say the gold/silver circulation leaked and somehow we don’t have enough to replace the money. The solution to this was banknotes/cash. It did not matter if it actually had value based on the material. It just has value because – well – the government just says it has value. They knew that if the system had trust in it, it can work this way.

    Then, credit/debit cards came around. You don’t even need to see or know the person. You can do it all online. And you did not need to be carrying a handful of cash with you.

    And that brings us all to Bitcoin.

    How do they work? – How traditional banks work

    Let’s say that you make a purchase of a mouse (Assuming you are using a debit card) that costs $12 and you and the seller are using the same bank (If they are not it still works the same way, but your bank will contact their bank). The bank will have something like a spreadsheet. This spreadsheet will update itself in a way that states you lose $12 and the seller gains $12. If they are using a different bank then the bank will tell the other bank to manage their spreadsheet.

    Sign up for our newsletter!

    How do they work? – Ledger

    The way to think of cryptocurrencies is by running spreadsheets. But instead of each bank managing it, it is all crammed together. This is called a “ledger”.

    How do they work? – Why evreybody is going crypto-crazy

    Alright, we all have a good spreadsheet, but what’s all the fuss about?

    Well, there are advantages to a system like this:

    • It’s decentralised. Even though all transactions are on the same ledger, there are many copies of that ledger. Anybody who wants to can join over a million computers and get a copy of that ledger. You might have heard of crypto mining or bitcoin mining. All that is for somebody to crunch trough transactions on their copy of the ledger. There are already a million miners around the globe. Why they do it? You earn some crypto as reward. The way this works is that when I make a payment, lets say -5BTC, instead of checking with one banks record, it will check with every PC on the crypto network if I have enough, and when I do, each PC will give the go-ahead and update their record to make me lose 5 BTC independently.
    • It’s easy to tell if anything fishy is going on. Like if I try to hack into somebody’s PC on the network and give myself lots of bitcoin by adjusting figures on their copy of the ledger, it’s not going to get through. The system will realise that 99.9% of the PCs are all saying something else and only the hacked one is giving the go-ahead. It will know that it was tampered with. There is very clear organisation to the system. And many people beleve in it because they see the future as open-traceable transactions much more then some bits over here, some over there.
    • It can replace traditional banks. There are some countries with people who have access to the internet, which is all you need for crypto, but dont have access to traditional banks wire transfer. You don’t have to worry about intrest rates, and exchange rates. It can make transfers almost instantly. And… Anybody can jump on to the network. And most of the time, zero transfer rates.

    How do they work? – Blockchain

    The reason that cryptocurrencies are called cryptocurrencies is that they are secured by cryptography. One of the ways that most cryptocurrencies, such as Bitcoin, Dogecoin, Monero, and Etherium use is blockchain.

    Now many people get confused about blockchain. Remember this:

    Blockchain is not Bitcoin. Blockchain is not a currency.

    It is just a way of organizing these ledgers. And into, well, blocks. Every time I buy something via crypto, it gets recorded as a block. Each block contains transaction data:

    • From. Whoever made the transaction
    • To. Who are you paying?
    • Amount. How much?
    • It’s hash. A hash is a unique identifier.
    • Prev. hash. The hash of the previous block in the sequence, or, the previous transaction.

    And the idea all of this rests on is that if something in this block is changed, so does the hash. You might know where this is going now because each block contains the data of the previous block. If the hash changes, then the next block will no longer have a matching hash and, as a result, every block after that is declared invalid. Combine this with what we talked about earlier (The idea of more than a million PCs having a ledger), then if I wanted to fraudulently create a transaction that, let’s say, paid me money, I’d not just have to tamper with one block and every subsequent block, but I would have to do this on over a million computers around the world so that the majority of PCs also are consistent and will give the go-ahead in the network with the one I hacked. Probably not going to happen. Meanwhile, bank hacking happens. A lot. And it can be as simple as guessing someone’s six-digit pin. But there is a massive jump between hacking into bank accounts and hacking into 1,000,000 uncoordinated PCs. Fun fact: Crypto prices skyrocketing is known as “Mooning”.

    How long will it take to crack a bitcoin wallet address?

    A bitcoin wallet is a place where you store your bitcoin. Your wallet address is like your credit/debit card number. A bitcoin address is a random 256-bit number.

    There are 2^256 different private keys. That’s larger than a 1 followed by 77 zeroes!

    Assuming it takes the same time to run an ECDsA operation as it takes to check a ShA256 hash (it actually takes much longer), and we use an optimization that allows us to only need 2^128 ECDsA operations, then the time needed can be calculated:

    It will take just over 0.65 billion years (653799211.223 years) to crack an address.

    EDIT: I did point out to myself that computers get faster over time according to Moore’s Law. Assuming PCs get twice as fast every year (they actually get twice as fast every two years but it’s better to play it safe), we can determine this by using the square root of the number, to help this go into a more real-world area:

    To be real, it will take 0.42 billion years (427453408.59 years) to crack an address.

    Bye!

    See you in the next part, where I actually talk about the issues of crypto, and all the alternatives.

  • How to build a gaming PC

    This guide will show you how to build a PC

    LightLightDarkDark

    Parts

    Here are the things you will need. The links lead to the components I used.

    Let’s get ourselves static-safe

    1: Unbox the PSU, plug it in:

    2. Touch the PSU (a metal part on it) whenever you rub your feet against the floor.

    Sign up for our newsletter!

    Motherboard

    1: Unbox your motherboard:

    2: Put everything else you unboxed in the box. Close the box. Take the motherboard out of its bag and put it on top of the box:

    CPU

    1: Unbox the CPU. Make sure to only hold it by the edges. Never the bottom or top.

    2: (carefully) Put the CPU in a static-safe spot.

    3: Release the motherboard retention plate by pushing the metal stick down, out, release:

    4: Now align the gold triangle on the CPU with the triangle cutout/dot cutout on the motherboard.

    5: Gently place the CPU in the socket. Don’t push it or apply any force. Just drop it in.
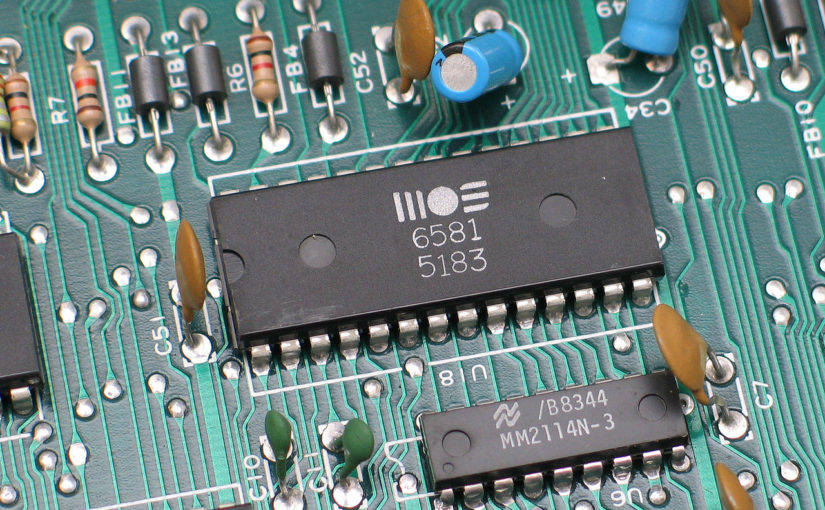
    6: Lower the retention bracket, making sure it’s guided by the top screw.

    7: Lower the metal stick and put it back in. It’s okay to feel some resistance.

    RAM

    1: Look for 2 slots that are different colors or a diagram that shows which sticks of RAM to put in first. Pull back the right tabs of these. The left tab, on modern motherboards, does not pull back:

    2: Unbox your RAM. Line the notches up:

    3: Once the notch(es) are aligned, push the RAM in with even pressure on both ends until you hear a click on each end. Repeat for other sticks:

    SSD

    Skip if you are not installing.

    1: Identify the notch similar to how you did with the RAM and insert:

    2: Insert the mounting post and screw:

    Cpu Cooler

    Now I’m sorry, I cannot make an instruction specific to this. Resort to your cooler’s manual to find out:

    PSU

    1: Insert your PSU and screw:

    Motherboard wire-up

    1: Take out the biggest cable from the pack (let aside the power cable) and attach it to the 24-pin input on your motherboard:

    2: Attach other end to a input labeld Motherboard or Mainboard:

    CPU/EMS wire-up

    1: Locate an 8-pin connector that is usually on the top-left closest to your CPU socket on your motherboard.

    2: Connect the other end to an input labeled CPU or EMS.

    3: Wire up if a second connector is present.

    Cable Managment

    This is really to your preference. I like to make it go around and stay away from fans and RGB. You will need zip ties:

    Chasis-Mounted Functions

    I’m sorry, I cannot make a guide specific to this either. Refer to the motherboard and chassis manual.

    POWER IT UP

    Plug in the power and switch the on/off switch to the on position. Put your case back together, plug in the keyboard, mouse, display, whatever it takes. Switch your monitor on.

    Now, take a deep breath and press the power button.

    TEST

    You should see your motherboard’s logo.

    If you see something like:

    BIOS Self-Test Output
    
    ASUS TUF Gaming Model Z390-PLUS SELF TEST
    VGA Detected
    Mouse Detected
    Graphics Detected
    Fast Boot Off
    
    New CPU Detected! Configure it in Setup
    Press F2 or DEL to enter SETUP

    Press DELETE on your keyboard.

    Get Windows

    If you want windows, Go here. Launch the tool.

    Read and accept the license terms.

    Go to Create Installation media > Next > **ADJUST SETTINGS TO MATCH** > Next > **PLUG IN A FLASH DRIVE THAT IS AT LEAST 8GB** > USB Flash Drive > Next > **SELECT YOUR DRIVE** > Next

    Once it’s done, unplug your drive and plug it into your new PC.

    Reboot the PC and follow the steps to install Windows. You can say that you don’t have a license key, but you’re going to have to activate it later.

    DONE!

  • Downloading ASUS Aura Sync

    LightLightDarkDark

    You can download it from the ASUS Website.

    Sign up for our newsletter!

    I suggest this video:

  • How to jumpstart a PSU

    How to jumpstart a PSU

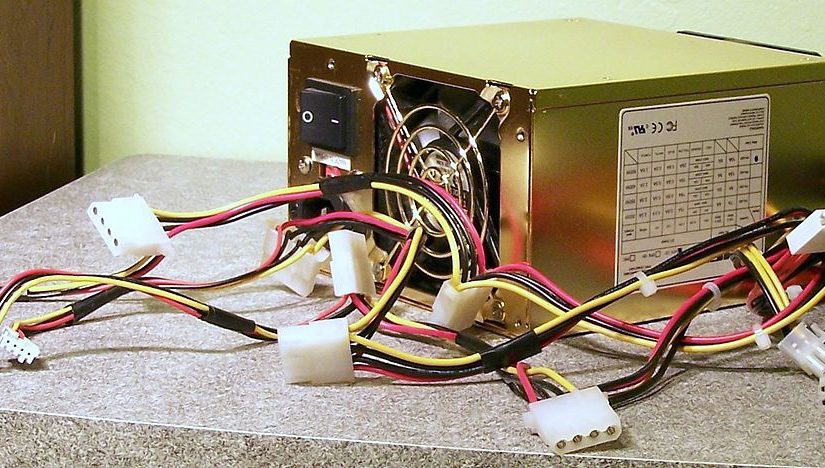
    Now, when you first get this PSU, you might want to test it. For that you will need to build a PC yourself. You don’t have one (or all the parts that you need)? Well, you are out of luck. Unless, unless, if you can jumpstart one. This guide will show you how to do so.

    LightLightDarkDark

    UPDATE (9:48 PM EST, 6/30/2021 US Time): I have a new project

    I have a new project. I am waiting on its parts. I don’t think I even need to tell you what it is, just look at my stash and you will see:

    I’m building a PC

    Sign up for our newsletter!

    How to do it

    If you don’t have an adapter that came with your PSU, try these:

    1: Grab your 24-Pin motherboard connector:

    The 24-Pin Motherboard Connector That Comes With Your PSU

    2: Plug your 24-Pin cable into the PSU:

    Plug it in

    4: There is probably a notch on the power cable. Look for it:

    The notch

    5. Make the notch turn to your right:

    Make it

    6. If necessary, make the pins face you:

    Make it like this

    7. Now the fun, and hard part: Placing the paperclip. Start from the top-right pin, counting down to the bottom-right pin. Once you hit the 4th pin, stick one end of the paperclip. Once you hit the 5th pin, stick the other end. Simply put, in semi-tech terms, short pins 4 and 5 (PS-ON and Ground (GND)):

    8: Now, switch the Power Supply Unit (PSU) on:

    Done!

  • How to set up a Static IP to the Raspberry Pi

    How to set up a Static IP to the Raspberry Pi

    LightLightDarkDark

    If you don’t want the router to keep assigning a new IP to the pi every now and then, then set a static IP. Image Credit

    How to do it

    1: First, Check if a service is enabled:

    BASH
    
    sudo service dhcpcd status

    Sign up for our newsletter!

    1.1: If it is, you are good to go. If not, run the commands:

    BASH
    
    sudo service dhcpcd start
    sudo systemctl enable dhcpcd

    2: Run command:

    BASH
    
    sudo nano /etc/dhcpcd.conf

    3: Uncomment (remove the # that is at the beginning) the following lines:

    CONFIG
    
    interface eth0
    static ip_address=192.168.0.4/24
    static routers=192.168.0.1
    static domain_name_servers=192.168.0.1

    3: Change the line static ip-address=192.168.0.4/24 to what you want your new static IP to be. static ip_address= proceeds, /24 follows. It should look like this. NOTE: Your IP has to start with 192.168 for this to work:

    CONFIG
    
    static ip-address=[Your IP]/24

    4: Press CTRL+ALT+X

    5: Hit Y

    6: Reboot:

    BASH
    
    sudo reboot

    7: Now, on a Windows machine on the same network, open up Command Prompt and type the batch code. NOTE: THE -t FLAG IS NOT REQUIRED:

    WINDOWS BATCH
    
    ping [YOUR PI'S NEW STATIC IP] -t

    8: Now wait for a response to test if it’s working

    DONE

  • How to create a ZIP Bomb in Windows

    LightLightDarkDark

    Okay, what is this “ZIP Bomb” anyway?

    A Zip bomb is a small file that only contains something like “42 Kilobytes”. However, when extracted, this can be, like, petabytes.

    Sign up for our newsletter!

    How to make one yourself: What you will need

    How to make one yourself: Step 1 – Create the junk

    Now what you have to do is launch Dummy File Creator (Dummy.exe)

    It will prompt you to size. Choose something like 30 Gigabytes. If it does not let you, choose 10.

    Now click “Create”.

    How to make one yourself: Step 2 – Make the folders

    Now put the dummy file in a folder.

    Duplicate the folder as much as you can.

    Put that all in one folder.

    How to make one yourself: Step 3 – Zipping it all up

    Right-Click the folder with lots of other folders and go to 7-Zip > Add to [THAT FOLDERS NAME].zip\.

    How to make one yourself: Step 4 – Done!

  • Block Ads using AdGuard Home on the Pi

    Block Ads using AdGuard Home on the Pi

    LightLightDarkDark

    If you want to block ads, then AdGuard Home is for you. AdGuard Home is an ad-blocker. But this ad-blocker would work network-wide.

    We recommend a static IP for this tutorial

    Items you will need

    • A Raspberry Pi
    • It’s peripherals

    Sign up for our newsletter!

    Installing AdGuard

    This will show you how to install it.

    This is simple because we are downloading a compiled version of it.

    1: Upgrade all our apps and some of the system:

    BASH
    
    sudo apt update
    sudo apt full-upgrade

    2: Download a compressed version of it:

    BASH
    
    wget https://static.adguard.com/adguardhome/release/AdGuardHome_linux_arm.tar.gz

    3: Create an extracted version of this that we can actually work with:

    BASH
    
    tar xvf AdGuardHome_linux_arm.tar.gz

    4: We don’t need the compressed version of this because we already have an extracted version that we are going to work with. Since we are can’t (and not going to) work with this one, lets delete it:

    BASH
    
    rm AdGuardHome_linux_arm.tar.gz

    5: Lets move in to our newly downloaded and extracted software:

    BASH
    
    cd AdGuardHome

    6: Finally, we can install AdGuard on our system as a Startup Service:

    BASH
    
    sudo ./AdGuardHome -s install

    7: Once installation completes, you should see a message in your command line.

    Accessing AdGuard via the web portal / Setting it up

    For this stage, you will need you and your Pi to be on the same network.

    1: Navigate to the portal. Go to your Pi’s IP address (to find out what it is, run hostname -I OR sudo hostname -I), followed by :3000. It should look like this:

    URL
    
    http://[IP ADDRESS]:3000/

    2: You should get a screen like the one below. Click Get Started to proceed with the setup steps:

    click get started
    Click “GET STARTED”

    3: Just race through the steps. But make sure you actually read them. If it complains that a port is in use, try a different one. I strongly recommend you have a Static IP Address set up on the Pi. NOTE: IN ORDER TO MAKE THIS NETWORK-WIDE, YOU HAVE TO SET UP “ROUTER” AS A DEVICE. IF YOU ALREADY ARE AT THE DASHBOARD, CLICK “SETUP GUIDE” IN THE MENU.

    Done

    1: You now have a full-functional AdGuard Home installation on a Pi. If you already configured devices on AdGuard Home, or you made it network-wide, you should already see stats.